Install & reinstall the workstation service
Purpose: Install the counter payment service from scratch, or reinstall it cleanly when a workstation has stopped taking payments.
When to use this: A new counter is being set up, or an existing one is broken and a clean reinstall is the fix. The reinstall steps below are the authoritative procedure, follow them in order.
This procedure ends with a note about EMV PARAM DOWNLOAD. If the workstation was already taking payments before you started, the reader already has what it needs. Do not press EMV PARAM DOWNLOAD during a reinstall, see Step 4.
Reinstall (the standard repair)
Step 1: Remove the existing services
Both payment services must be stopped and removed before you reinstall.
-
Open the Services console (
services.msc). -
Find the two payment entries, right-click each, and choose Stop. Match the VitaPay payment entry and the VitaPay Updater entry, the names can vary slightly by build (you may see VitaPay Service, VitaPayService, or VitaPayUpdater).
-
Confirm both show a blank Status (not Running) before going on.
-
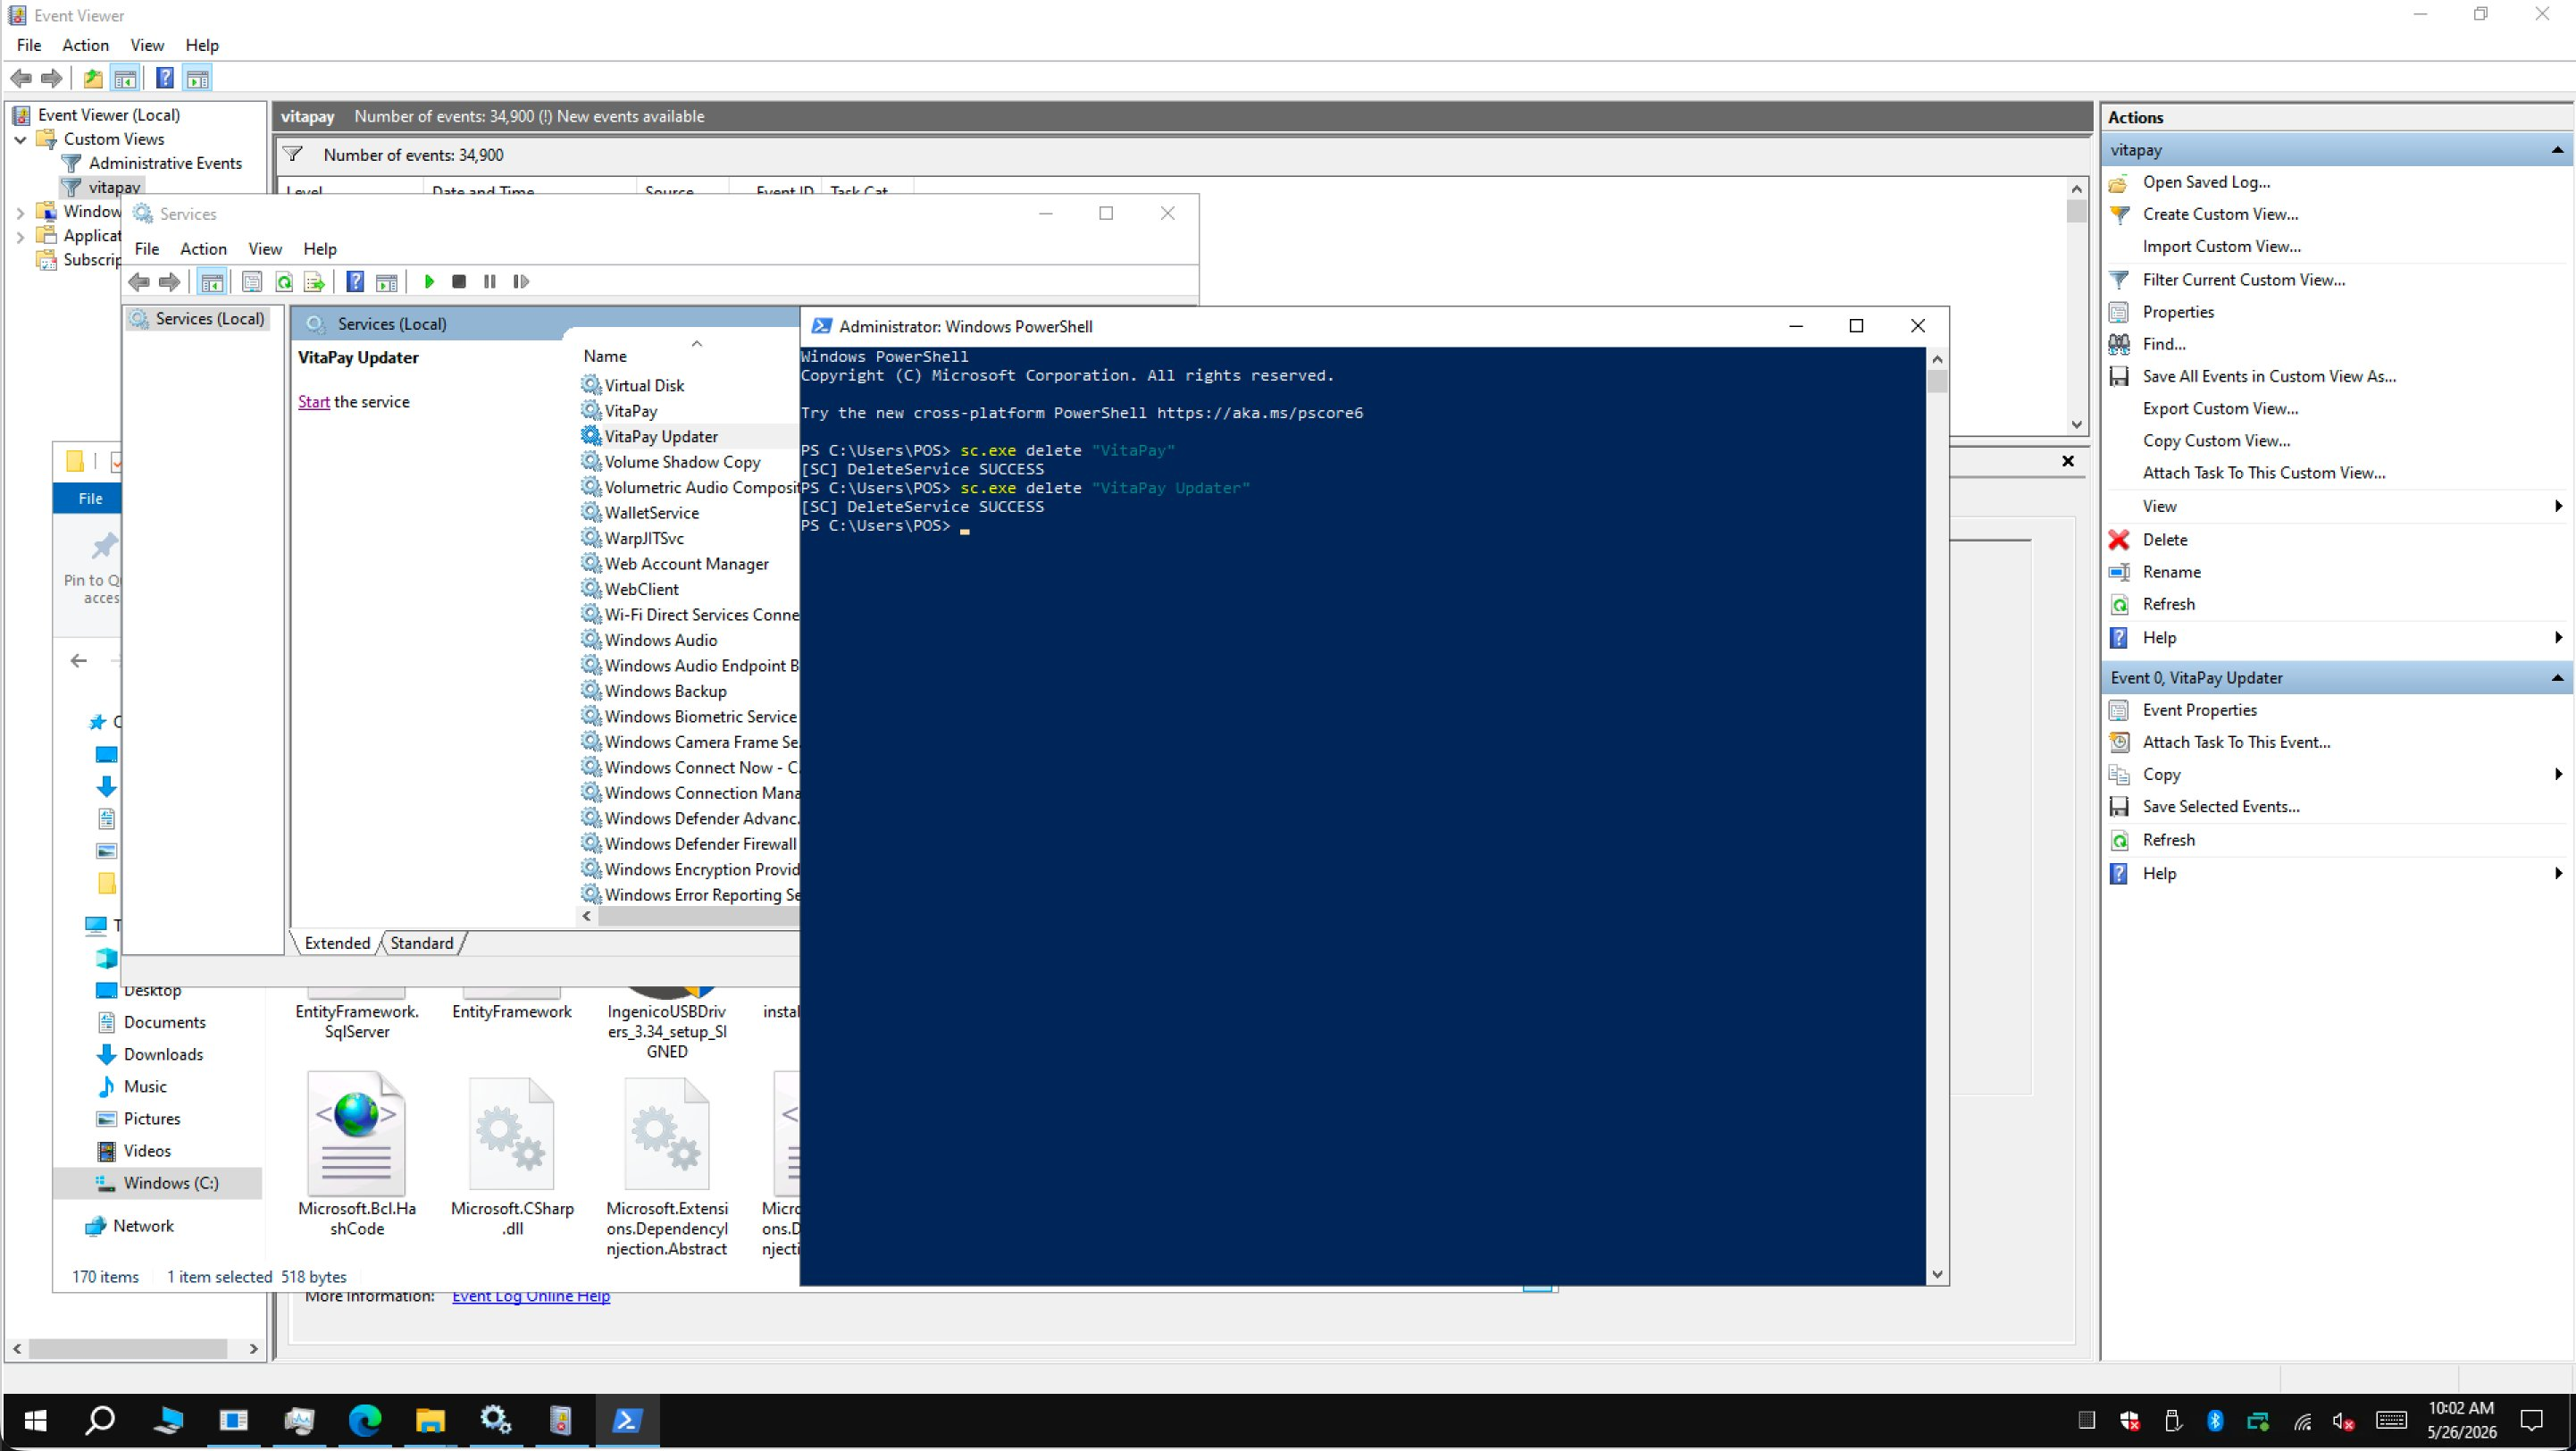
Open Windows PowerShell as administrator (Run as administrator) and remove the two registrations, one at a time:
sc.exe delete "VitaPay"
sc.exe delete "VitaPay Updater"
Each command should return
[SC] DeleteService SUCCESS. You can keep the Services console open next to PowerShell and watch the entries disappear. -
Download the latest installer (ServiceInstaller.exe):
https://vitapayservice.s3.us-east-1.amazonaws.com/ServiceInstaller.exe
 Stop both services in the Services console, then delete them with
 sc.exe delete in an elevated PowerShell.
Step 2: Run the installer and cancel the reader prompts
- Launch ServiceInstaller.exe from your Downloads folder.
- Enter the Merchant ID, click Start, then click Next through the prompts to let it run.
- The installer downloads its supporting components (USB drivers, configuration files), then tries to launch two sub-installers:
- dsiEMVUS (the card-reader middleware)
- NETePay Director and Manager (the payment gateway)
- Because both are already on the machine, Windows opens each on a Program Maintenance screen (Modify / Repair / Remove). You do not want to change them. Click Cancel on both the dsiEMVUS and the NETePay Director and Manager windows to dismiss them and let the install finish.
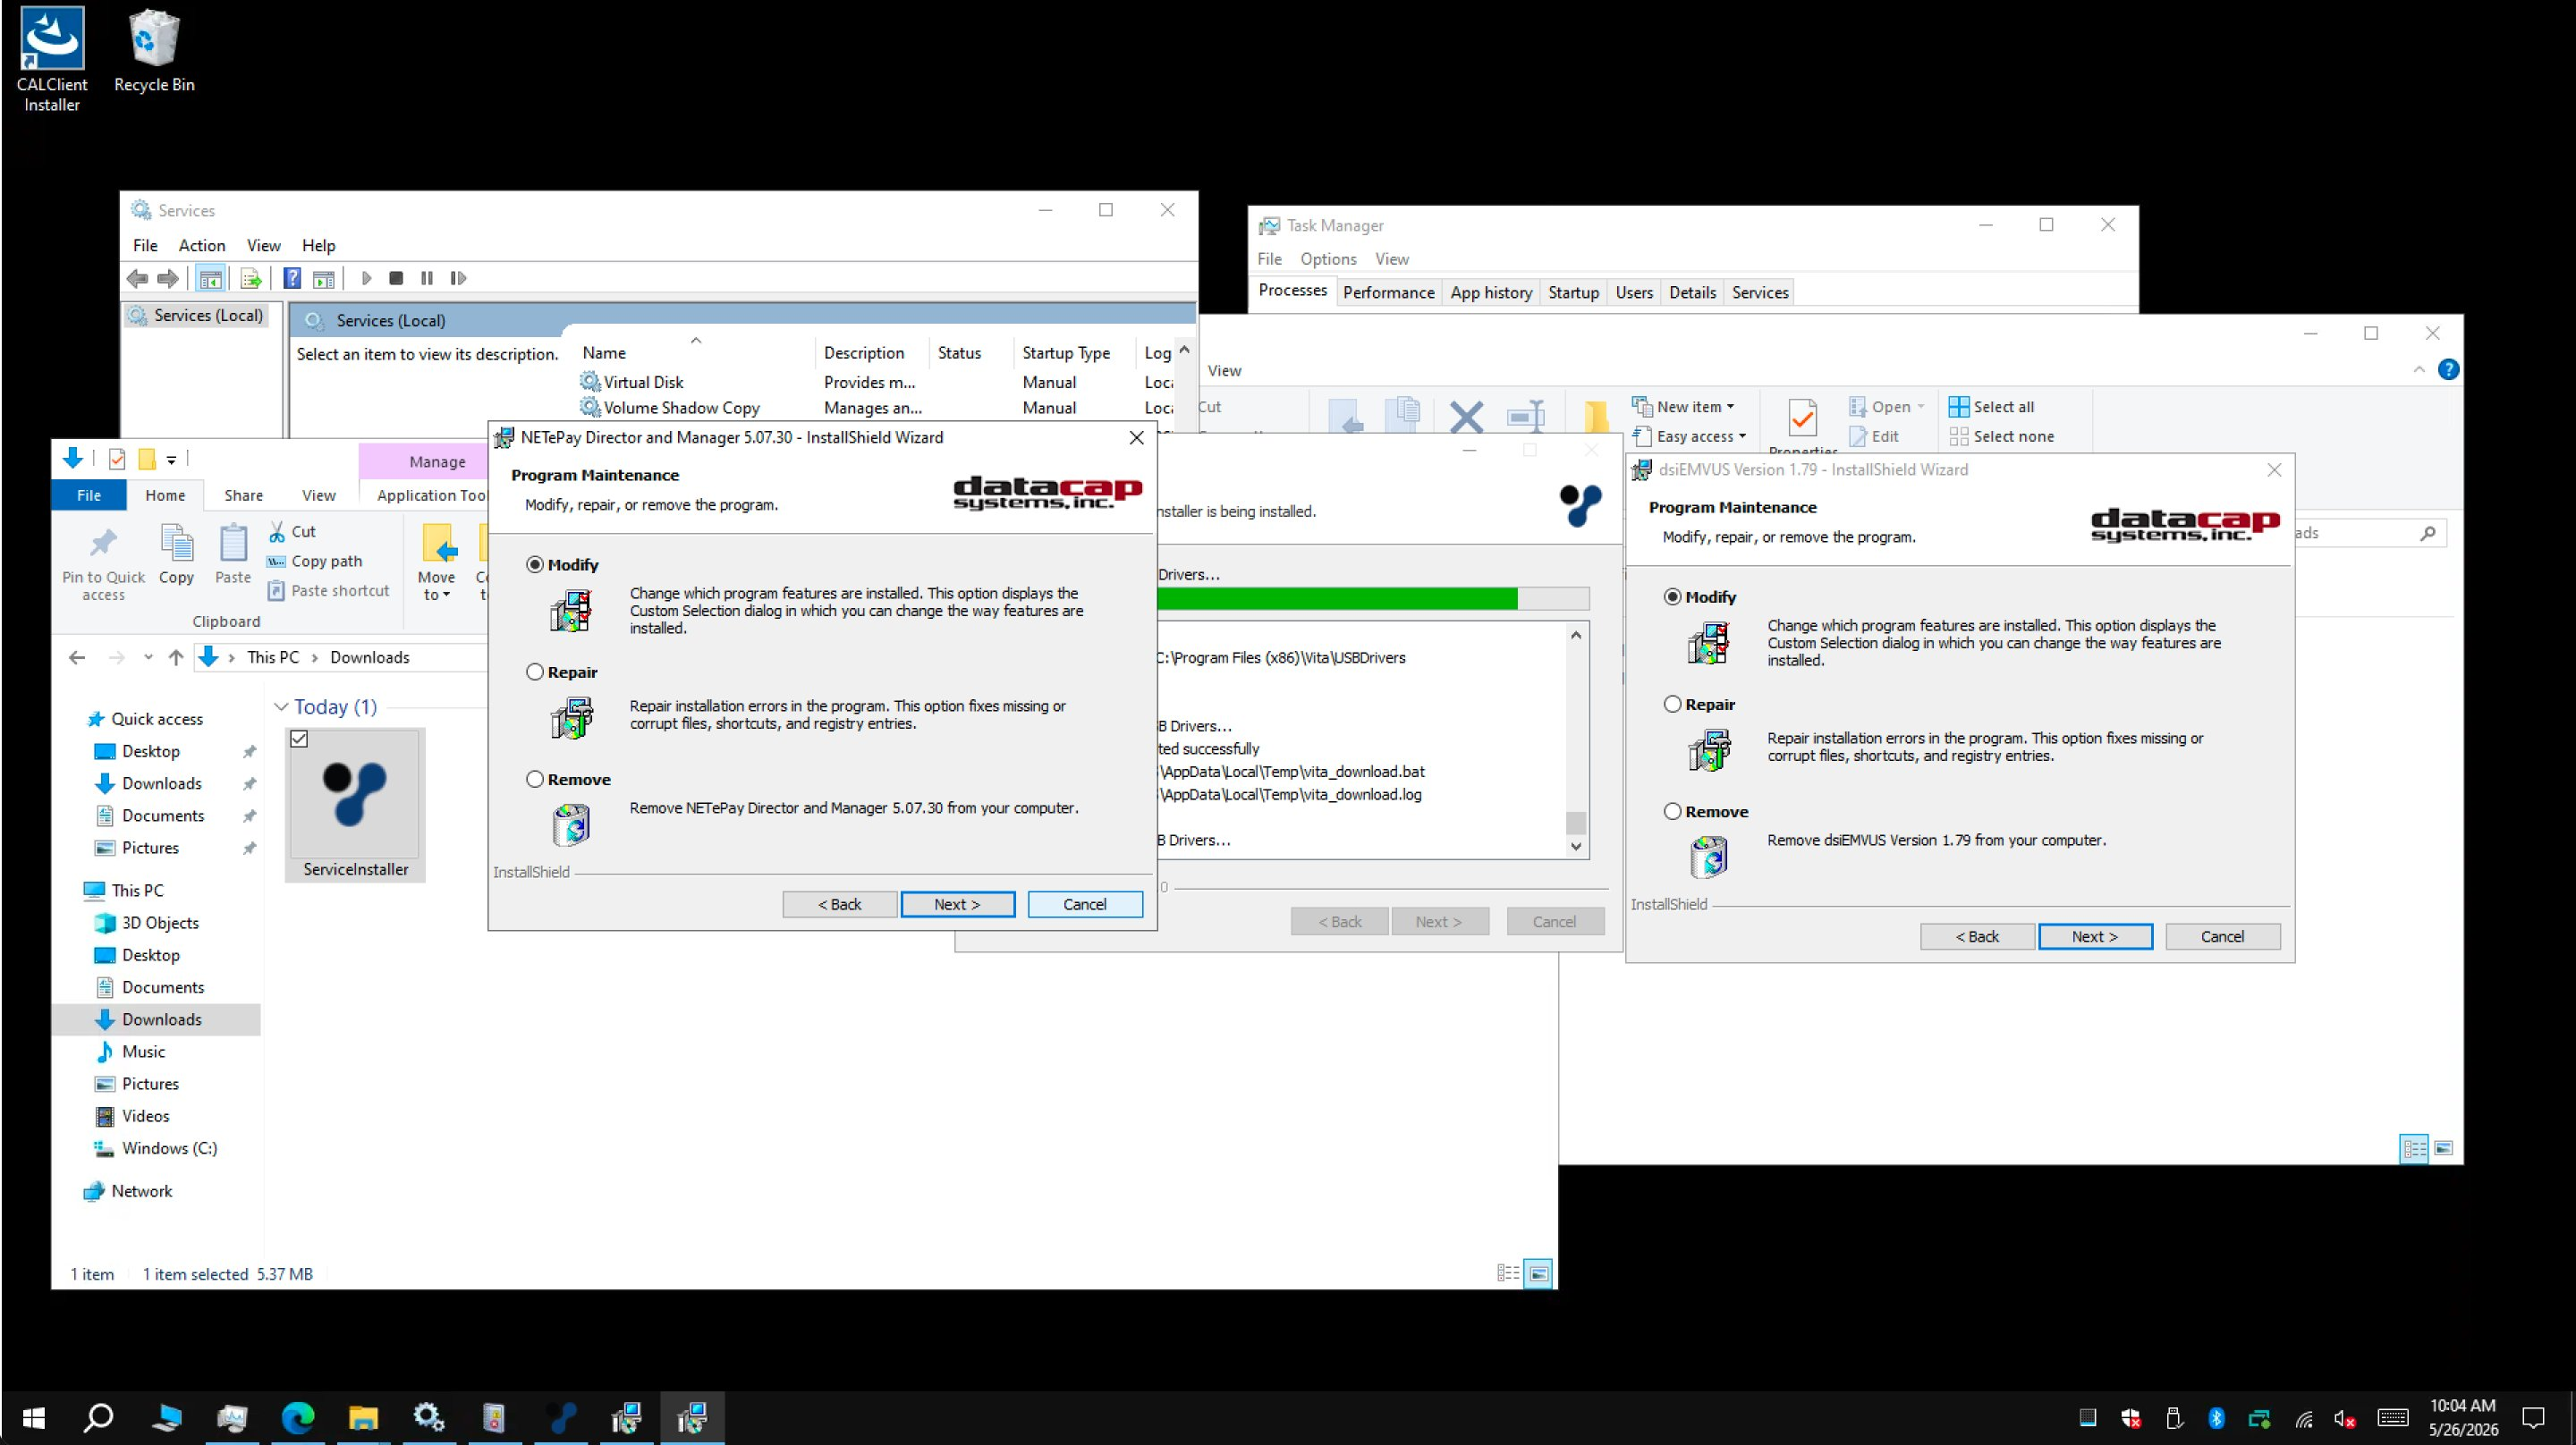 Click Cancel on both maintenance prompts, leave the existing reader and gateway installs untouched.
Step 3: Remove the legacy folder
The new installer puts the service in its current location. Clean up any leftover folder in the old path so configuration and logs don't end up split between two places.
-
Open the legacy install folder. On many machines it sits under the Oracle Simphony directory:
C:\Micros\Simphony\VitaPayYour exact path may differ depending on how the machine was originally set up.
-
Right-click the legacy VitaPay folder and choose Delete (or Shift+Delete to skip the Recycle Bin).
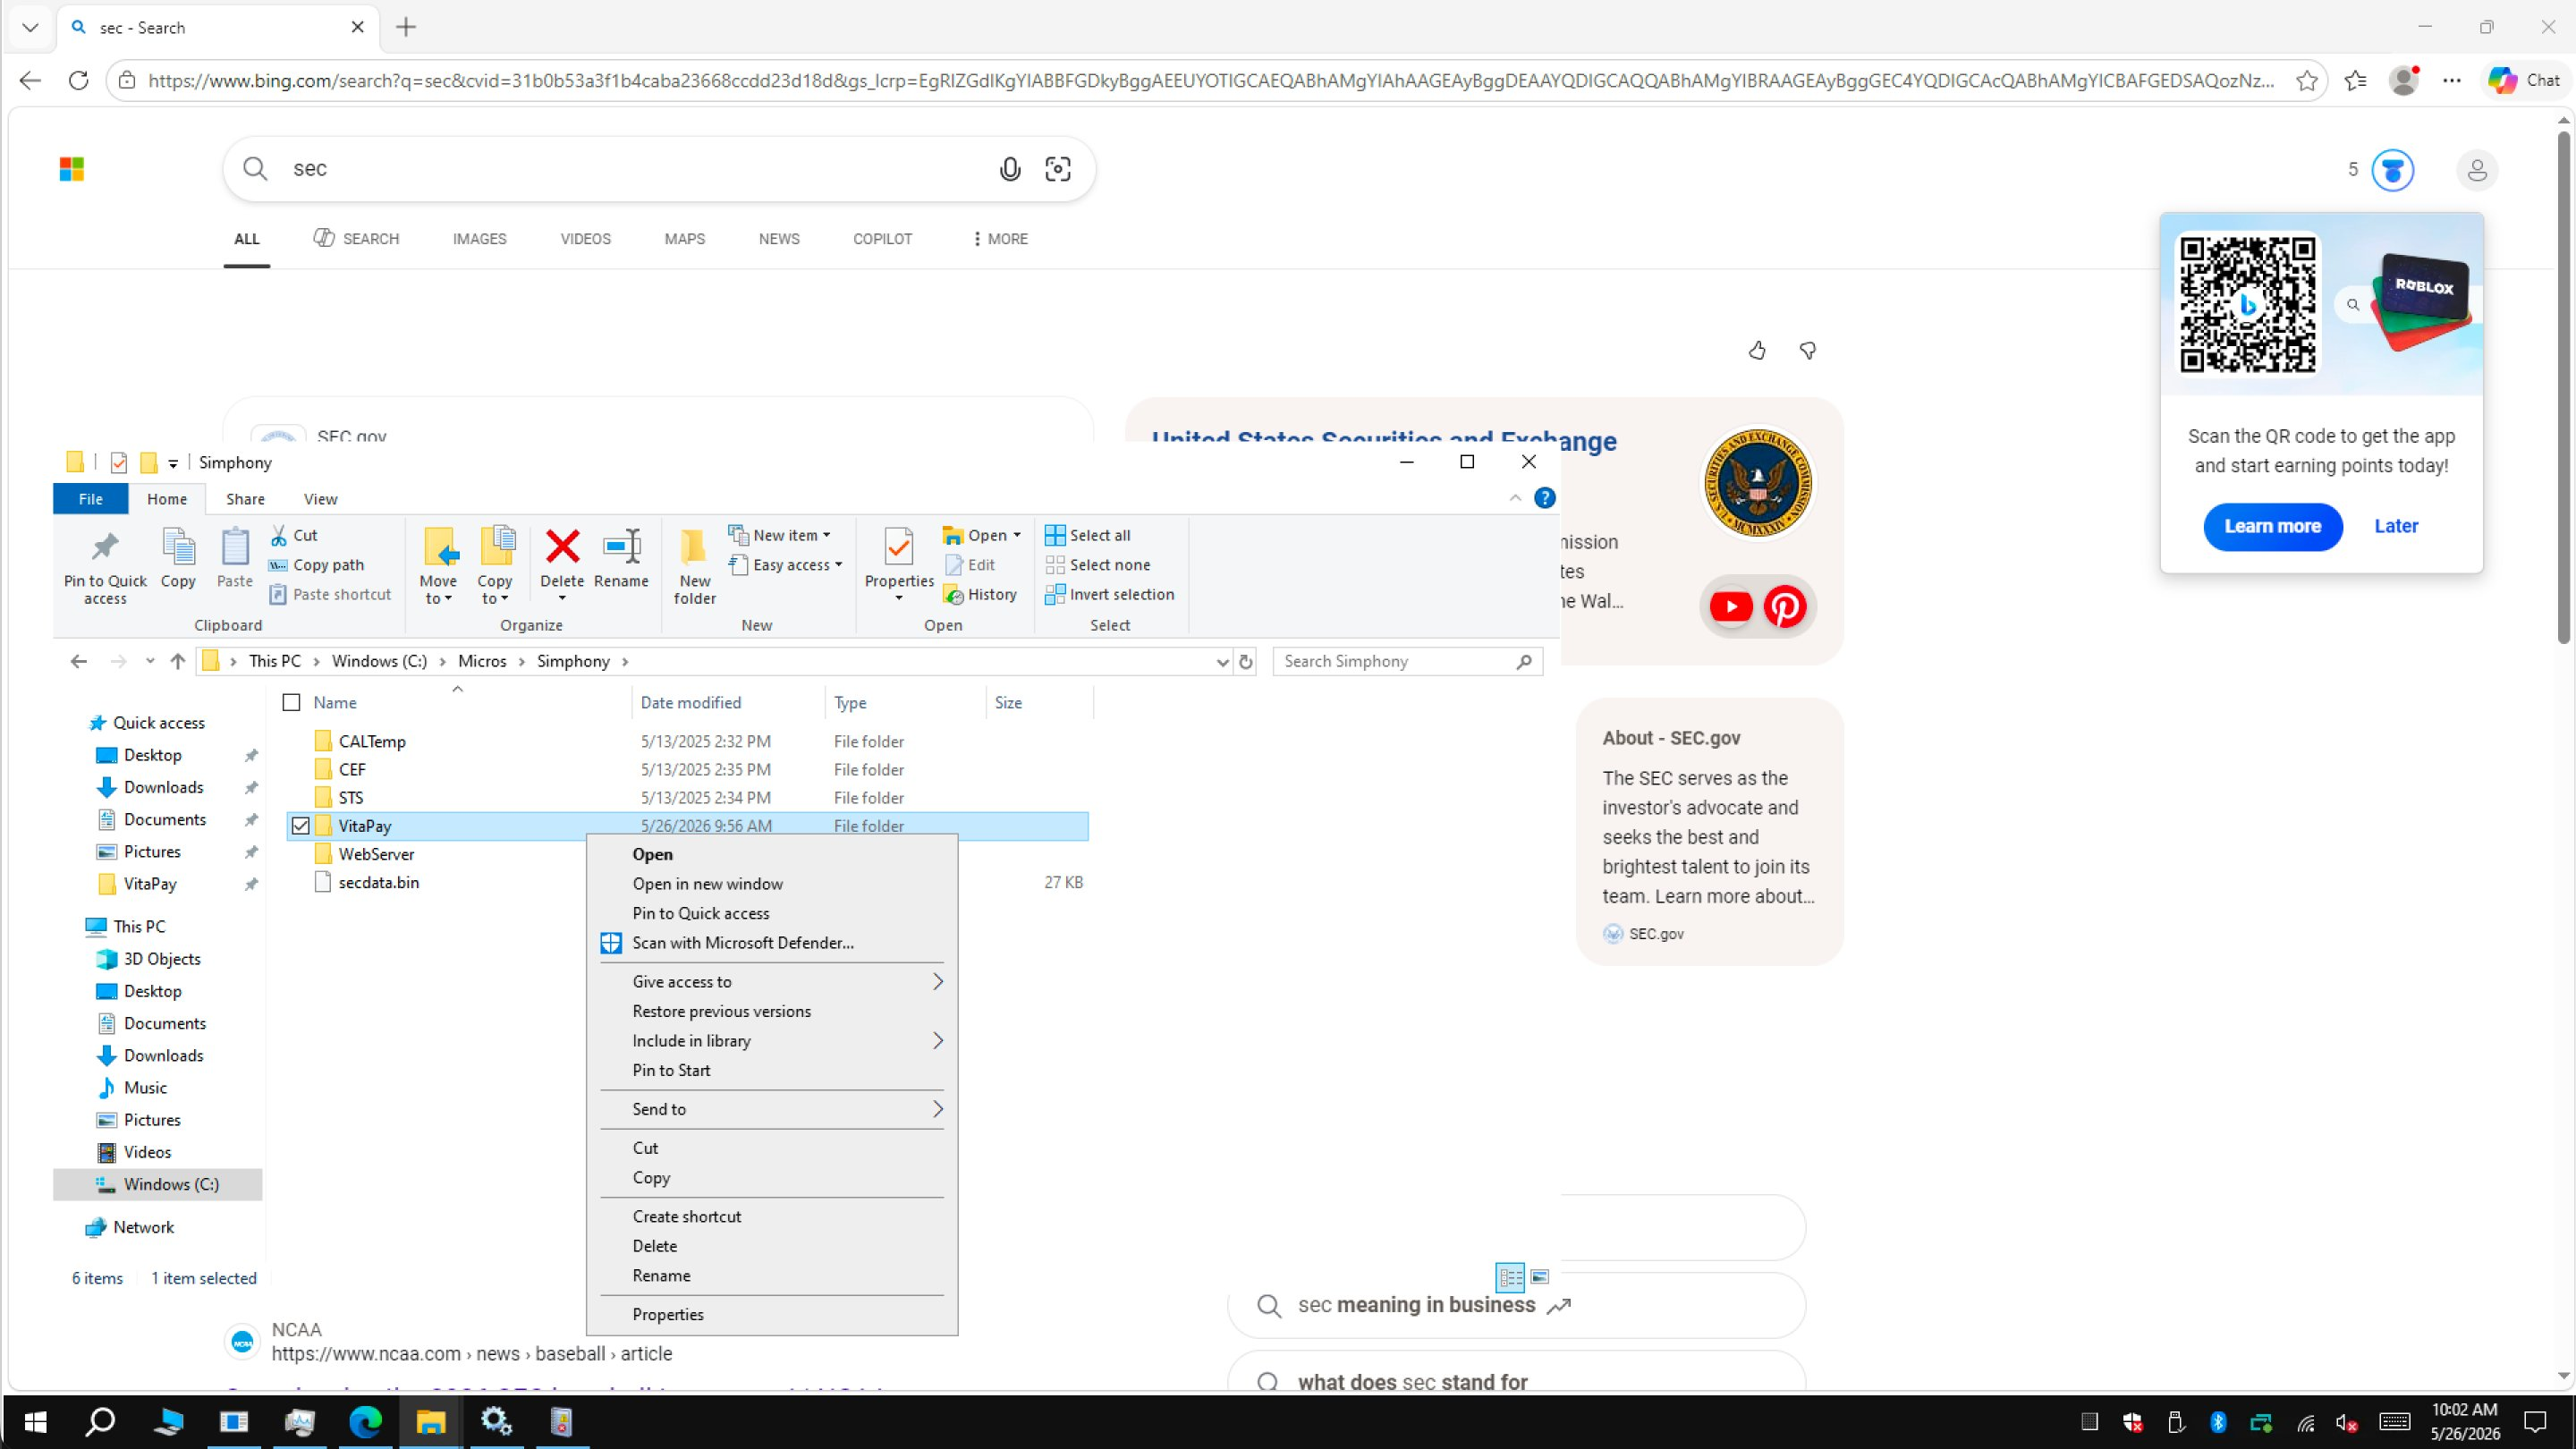 Remove the old folder so the workstation only references the new install.
Step 4: Start the services and verify
-
Start both services again, from the Services console (right-click → Start), or from an elevated PowerShell:
sc.exe start "VitaPay"
sc.exe start "VitaPay Updater" -
Confirm the install in either of two ways:
-
Event Viewer (
eventvwr.msc), the services should initialize without errors. -
The config dashboard: open a browser on the workstation and go to:
http://localhost:3036/api/dashYou should see the config dashboard with the Last Reload time, the SecureDevice (for example
EMV_P400_DATACAP_E2E), the EnableMobileTerminal status, and the action buttons (Reload Workstation Config, EMV PAD RESET, EMV PARAM DOWNLOAD, Check / Push Up Offline Transactions, Upload Logs Now).
-
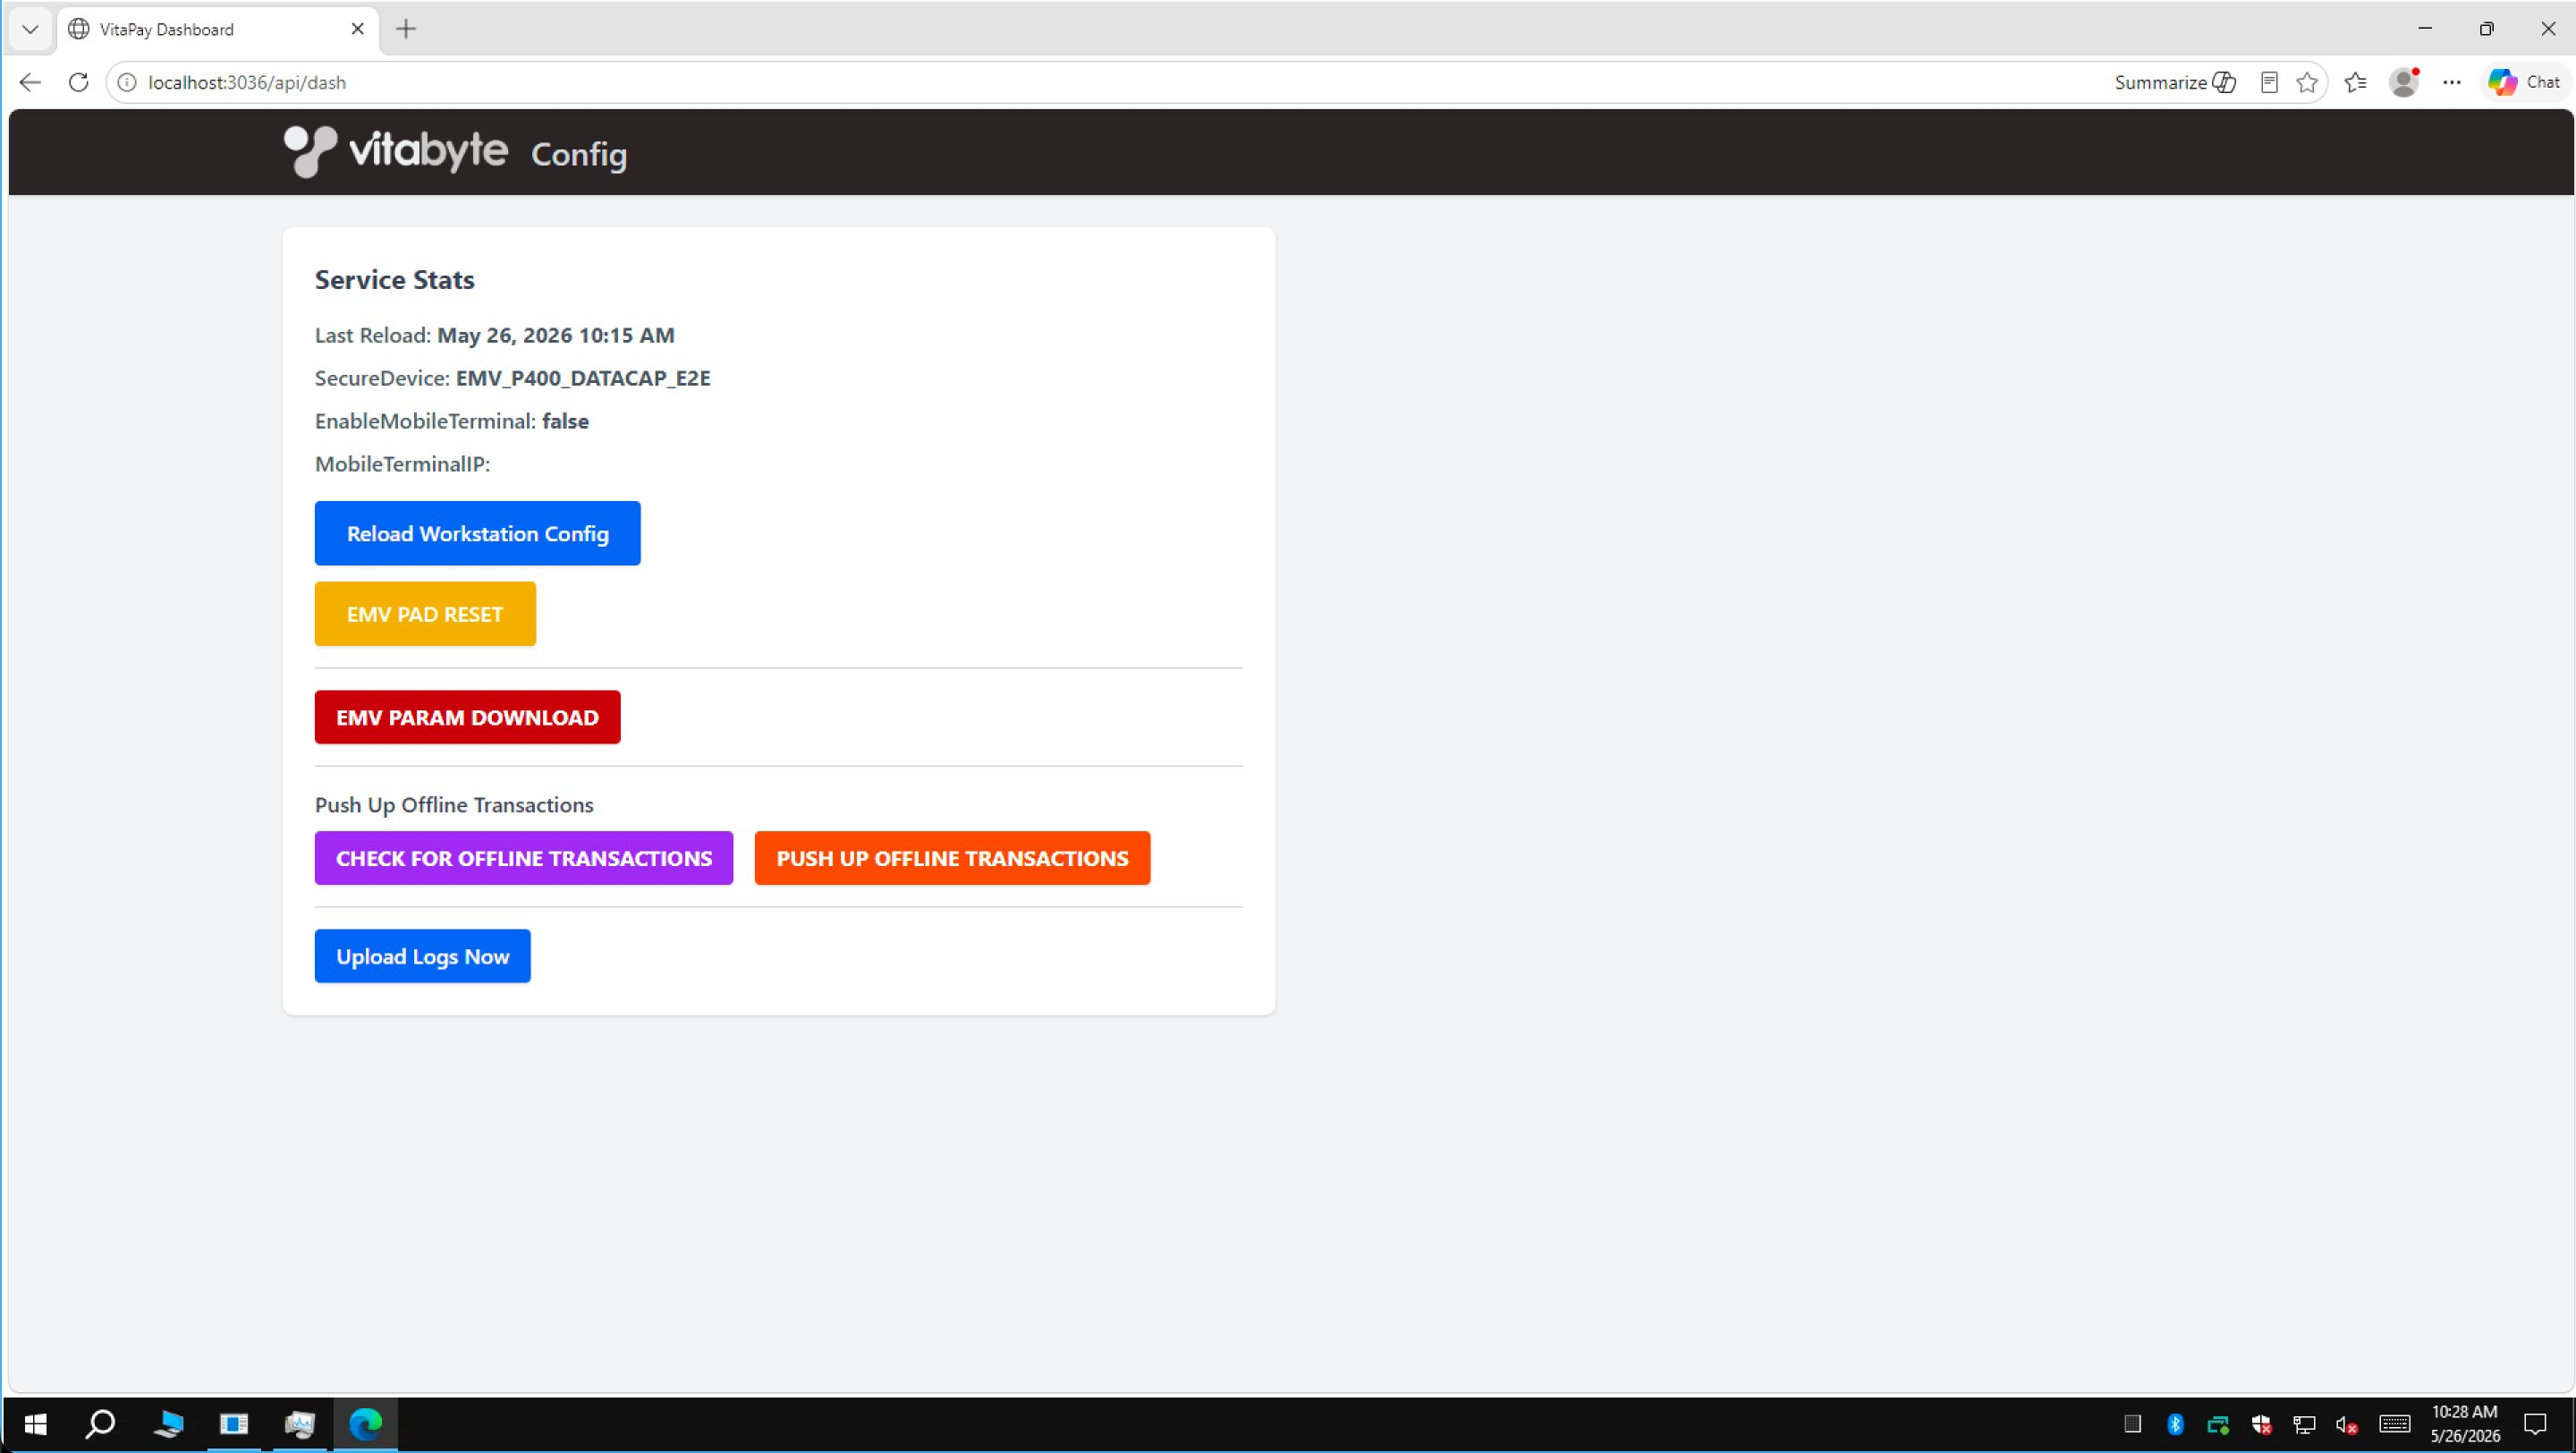 The dashboard at
 localhost:3036/api/dash confirms the service is up: Last Reload, SecureDevice, and the action buttons.
- If the reader is already rebooting on its own (the service is re-initializing it), don't press anything: let it finish.
- EMV PARAM DOWNLOAD is for new readers only. It pulls the merchant configuration onto a reader that doesn't have it yet.
- If this workstation was already taking payments before the reinstall, the reader already has its configuration, so do not press EMV PARAM DOWNLOAD. It is not needed for a reinstall.
First-time install
A brand-new machine uses the same installer with one extra decision:
- Run the launcher (VitaPayLauncher.exe).
- Enter the Merchant ID.
- Tick the CAPS Server box only if this PC is the site's central server (the one machine that holds the shared payment data for the location). Leave it unticked on every other PC.
- Continue the install, cancelling the dsiEMVUS and NETePay Director and Manager maintenance prompts exactly as in Step 2.
Verify
You'll know the install worked when:
- Both services show Running in the Services console.
- The dashboard at
http://localhost:3036/api/dashloads and shows a Last Reload time. - A small test sale on the terminal returns Approved, and you can Void it. After it, the dashboard's Last Reload should be recent.
The workstation pulls its config from the cloud by the machine's hostname. If the cloud config's Workstation Name doesn't match this machine's Windows hostname, the service can't find its config and won't start. Check the name in the portal, see Provisioning.